Dangar recipe with a tempering of food for thought

Some food tastes like Earth.

It is a slightly confusing concept, even in my mind, but stay with me, dear reader, as I take you on this train of thought. What I mean is, several of these things and not one.

Earthy food (lets just call it that) invokes a strong sense of being connected to the natural world around us. While partaking it you feel compelled to sit on a cool bare ground with legs folded in sukhasan. It reminds you of petrichor even on a sultry summer afternoon. It harks back on “then” inconsequent childhood memory that time and tide have shelved away. It takes you back to the carefree summer vacation to your native place and visit to the farm. It nourishes your soul, restores your well-being and takes you on a happy trip. Yet it is not to be confused with comfort food. You’d never want to have earthy food when you’re under the weather and therefore not really comfort food. You’d enjoy it greatly only when all your senses are fully alive.

Earthy food is chunky, rustic and closest to its original form. It is of a humble origin. It is seldom decadent, has minimalistic spices – just enough to season, and not overtly cooked. To me anything that largely involves grains fall under this category. All traditional breads like Millet roti, Bhakri (flat round unleavened bread), Pita, Ciabatta bread, Poi (Goan chewy loaf), or Podi/Metkut (coarse powder of dry roasted grains seasoned with dry spices and chillies) to name a few. Or any vegetable, not raw, but when infused with smokiness by roasting on a traditional coal tandoor or open flame with minimalistic spices, especially brinjal/baingan. I also have a strange fixation of teaming earthy food with chunks of raw white onion, that just sums it up for me.

Excuse me, dear reader, if that was a bit too elusive, but if the thought traveled with you, then do leave me a comment, I’d love to know your two bits. Now let me redeem myself for the time you spared with a recipe that stands for all of the above and more.

Dangar

Dangar

On mumma’s recent sojourn, she restocked my kitchen with her signature dry chutneys, pickles and goda masala (traditional Maharashtrian garam masala). She also surprised me with Dangar mix.

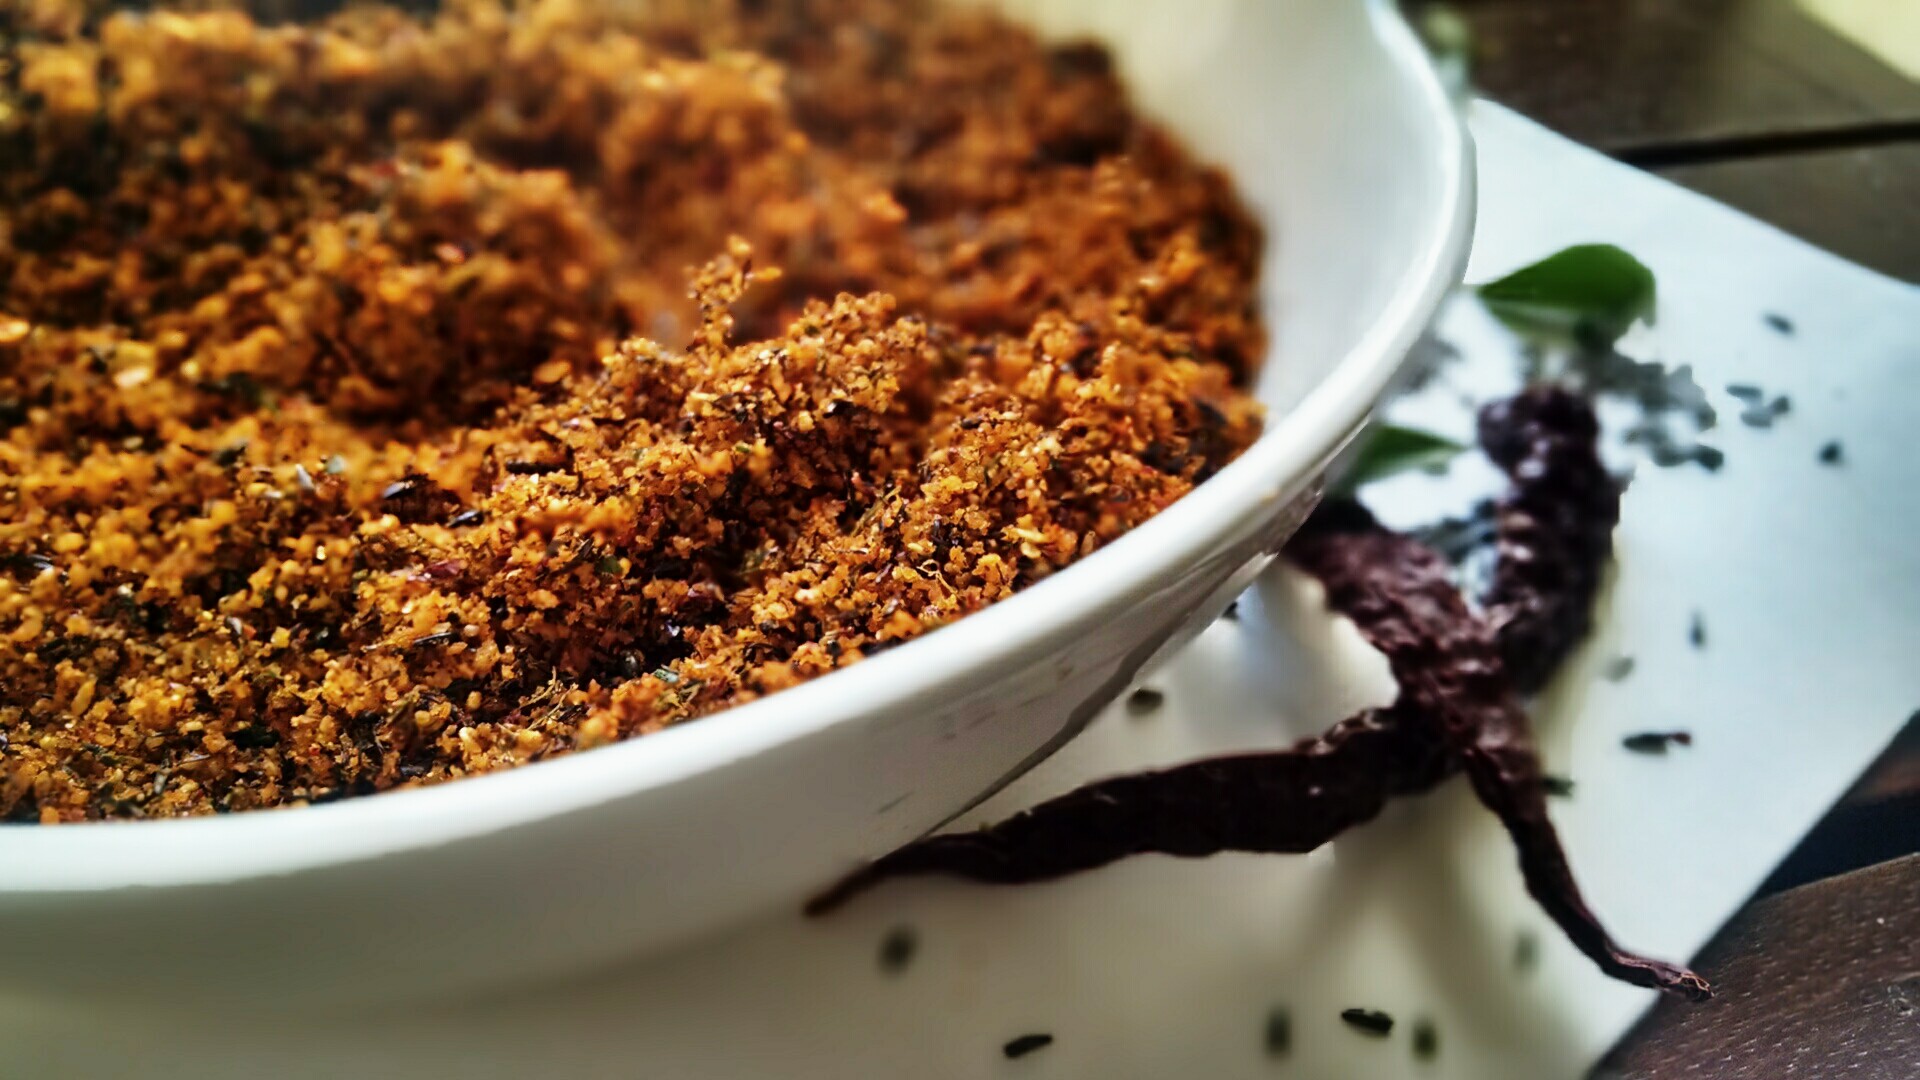
Dangar is a yogurt based raita of dry roasted and coarsely ground assorted grains that are staple to the Maharashtra plateau region. Dry roasting of grains brings out the robust earthy flavour which is then coarsely pulsed in a grinder to retain crunchy bite of the grain. This grain mixture is served like a yogurt based raita topped with simple tempering. Addition of chunky raw onion to the dish lends an overall crunch. It is traditionally teamed with Zunka, Bhakri and Thecha. Dangar finds its root in the Thanjavur Marathi households, which is no surprise as it closely resembles South Indian array of Podis which are made with assortment of grains and dry spices.

Dangar

Dangar with rice flour bhakri and thecha

Ingredients-

:: For Dangar mixture-
1 cup Urad dal (Black gram)
Half cup Chana dal (Bengal gram)
2 heaped tsp Rice
1 tsp Coriander Seeds
1 tsp Cumin

:: For raita-
2 tbsp danger mixture
3-4 tbsp natural yogurt
half tsp cumin
half tsp mustard seeds
2 dry red chillies, whole
a sprig of curry leaves
pinch of asafoetida
1 tbsp vegetable oil
1 white onion, chopped
Salt to taste

This is how I made it-

:: For Dangar mixture-
1) Dry Roast urad dal, chana dal and raw rice till golden brown and fragrant. Remove from heat, keep aside.
2) In the same wok/pan, dry roast cumin and coriander seeds till fragrant. Remove from heat and let it come to room temperature.
3) In a mixer grinder first add roasted sumin and coriader and pulse to a fine powder.
4) Add roasted grains to the same grinder jar and pulse the mixture coarsely till semolina consistency (jada rava). This is an important step and care should be taken to not make it into a fine powder.
5) Store the dangar mixture in an airtight jar. It has a shelf life without refrigeration of about 2 months.

:: For Dangar raita-
1) In a serving bowl, add 2 tbsp of dangar mix, 3-4 tbsp of natural yogurt, chopped onion and salt as per liking.
2) In a small wok, or a tadka ladle, prepare a tempering with other ingredients. For tempering, heat oil, add mustard, let it crackle. Add cumin, followed by asafoetida, red chillies and curry leaves.
3) Tip in the tempering in the serving bowl with other ingredients and give it a good mix.
4) Taste and adjust salt.
5) Serve it with hot bhakris, thecha and pithla/zunka.

Salted Caramel Sauce – 5 ingredients and 5 minutes

God or No God. Your argument can swing either way. But there’s absolutely no denying that there IS Food For God. No argument there. If I ever place a devhara (sacred corner in the house meant for idol worship) at my home, all things listed here will be snugly sitting as I pray to the demigod of food to never let my supply deplete and to inspire me to create magical food with their alchemy. Such is my devotion.

Salted Caramel Sauce

Salted Caramel Sauce

My first introduction to salted caramel sauce was 2.5 years back, at Starbucks. During X’mas they had introduced a special coffee on the menu for the holiday season, laced with “Salted Caramel”. I so totally fell for it that I made numerous visits after that. Holiday season passed away in a jiffy, as it always does, and the coffee flavour was taken off the list. My heart sank. It won’t be wrong to say that I waited for a whole year to pass with a hope that it’ll be reintroduced, and guess what! Yes it was! But this time I was prepared for the short spell and had put it on my checklist of recipes to try. After looking up several recipes, which involved reducing copious amount of cream to caramelizing sugar to perfection, I settled for a recipe that required neither. This one is your super simple salted caramel sauce with 5 ingredients and 5 minutes, and like most things simple, it will not fail to impress.

5 Ingredients Salted Caramel Sauce

5 Ingredients for Salted Caramel Sauce

Ingredients-
Half cup salted butter (Half a packet of 100 gms Amul butter)
1 cup brown sugar
2/3rd cup cream (200 ml of Amul Fresh Cream or D’lecta Creme is perfect0
Half to 1 tsp sea salt (poor substitute will be table salt)
1 tsp good quality vanilla extract

This is how I made it-

Decanting salted caramel sauce into a jar

Decanting liquid gold.

1) Melt butter in a deep saucepan on a simmer, swirl it around to avoid getting burnt.
2) Next, add brown sugar part by part. Keep mixing it with a whisk for the next 2 mins just until it melts. You do not need to caramelize sugar for this recipe.
3) Immediately add cream in a thin stream while whisking with the other hand. Once well incorporated leave it for the next 2 mins on simmer till the sauce comes to a boil. Take care that sauce does not burn at any point.
4) Once it comes to a boil, take it off the gas and add sea salt and vanilla extract. Start with half tsp of salt, taste, add more if desired.
5) Decant in a clean odour-free jar. Sauce will seem thin at the beginning, but it’ll gradually thicken as it cools down.
6) Keep it refrigerated. It stores well in the fridge for upto a month.

*Notes-
1) Salt elevates the sweetness of the caramel to a glorious level. So even if you dislike the idea of salty caramel sauce, do not miss a hint of salt just to balance out the overt sweetness.
2) Psst.. add a tsp or more of Old Monk or Bailey’s Irish Cream for a boozy spin.
3) On decanting the sauce into a jar, there’ll be leftover clinging to the edges of the saucepan. Boil a cup of milk in the same saucepan till all the remnants of the sauce is dissolved, pour it in a mug with a tsp of instant coffee or coffee decoction for your cuppa of salted caramel coffee.
4) Salted caramel sauce can be used in numerous ways. Drizzle over cut fruits, pancakes, waffles, cakes, bread pudding, tea cakes or make an ice cream with it.

Sea salt Caramel Sauce

Sea salt Caramel Sauce

If you’ve an interesting recipe using salted caramel sauce, do let me in!

Slow-roasted cherry tomatoes with garlic and oregano

Tomatoes have never inspired me, except as brilliant photo subject. Leave aside Maharashtrian style tomato raita (koshimbir) and soup (saar), since that’s staple in my house, I’ve never really dabbled in a tomato exclusive gravy or a salsa or a pasta sauce or as a marinade. The tangy flavour of a tomato does not go very well on my palette. I often cringe when people fondly talk about how they sink their teeth into raw tomatoes. I carefully remove tomato slices tucked away in the sandwich or burger layers before biting into it. R shares my aversion.

Between all the hate story, it so happened, I spotted the most luscious looking cherry tomatoes in the supermarket, absolutely fresh with the stem still on, as if just been plucked off the vine. Now we’re talking about a certain compulsive buyer, who can spend hours lounging in a supermarket isle of vegetable and fruit section with a yawning husband trying to entertain himself in the sport section. Those luscious tomatoes totally beckoned me, and without much ado I picked up two packets. Needless to say, I was totally clueless about where I would take it from there. I also happened to pick oregano, which was fresh with greenness still in the stems, that’s rare to find. I needed an inspiration. So like all of us, I turned to Google.

Slow roasted cherry tomatoes with garlic and oregano

Slow roasted cherry tomatoes with garlic and oregano

I’ve tried the canned version of sun-dried tomatoes and disliked the dehydrated chewy pickled skins. So that was immediately off the list. Next I came across a recipe for slow roasted cherry tomatoes that looked promising. The opportunities to use this condiment were limitless. So there I set out on the road less traveled, and trust me, only once before had I been so blown away by what lay ahead.

Cherry Tomatoes

Cherry Tomatoes

The recipe calls for slow roasting of 3-4 hours. Before you start cribbing about keeping the oven on for that long in the sweltering heat, let me reassure you, the oven temperature is so low that it would hardly impact your home temperature in anyway, the only by-product is the mind-boggling aroma wafting through the kitchen!  In the end what you get are the shriveled tomato halves, with a little bit of moisture still intact at the center, pickled in its own juices and steeped in the goodness of garlic and oregano flavoured oil. Slow roasting caramelizes the tomatoes giving it a robust flavour. Be prepared for an EXPLOSION of flavours that’ll completely sweep you off your feet. You’ve been warned! 😉

Here is a food fiction to let you savour before you take the plunge. “The Tale Of Two Tomatoes” (in the picture captions)

Cherry Tomatoes

So we begin the tale of 2 tomatoes..


cherry tomatoes

..along with their comrades, and this is how the story goes..

cherry tomatoes

..a drizzle of olive oil here, a dash of oregano there, garlic, sea salt, peppercorns and heavenly aroma everywhere..

slow-roasted cherry tomatoes

..So they rested in a sweltering oven, snugly, for several hours, only to emerge in the end, with those delicious super powers..

..only to have immortalized in their new robust avataar..

…Thus we conclude the tale of 2 tomatoes, along with their comrades..

..thus concludes, the tale of 2 tomatoes, and their comrades. To new beginning!!

..of a gastronomical journey, that was immortalized on a plate 😀

Ingredients –
2 cups cherry tomatoes
15-18 garlic cloves, peeled and bruised
10-15 strands of fresh oregano (substitute 1.5 tsp dried oregano)
1 tsp freshly ground peppercorns
Sea salt, as per taste
Half cup extra virgin olive oil  +  2 tbsp for adding on top later

This is how I made it-
1) Wash tomatoes, pat them dry with a kitchen napkin and halve them along the diameter (like a lemon). Lay them evently on a foil lined baking tray with cut side up, avoid overlap.
2) Place garlic cloves and oregano strands at regular intervals between the tomatoes.
3) Sprinkle freshly ground peppercorns, sea salt and drizzle olive oil evenly along the tray.
4) Place the baking tray in a pre-heated oven at 110 degree Celsius for 3-4 hours.
5) Do not open the oven door anytime in between. Keep checking only in the last hour.
6) Once tomatoes are shriveled up and garlic turned a shade of golden brown from roasting, they are done. Get the tray out of the oven and let it come to a room temperature.
7) Decant tomatoes along with its oil and seasoning in a clean odour-free air tight jar. Top up with 2 tbsp of extra virgin olive oil to preserve them. From here on, opportunities are endless.

Here’s what you can do, from million other can-dos –
1) Toss these beauties with spaghetti for a simple flavourful lunch.
2) Spoon in on a warm toast topped with egg scramble.
3) Top up on your cream cheese bagel.
4) Mix them with a summer salad of your choice.
5) When all tomatoes are done with, use up the gorgeously seasoned leftover oil for a veggie stir-fry.

Kaarla chutney – a little bit of warmth in your everyday meal

I hail from a simple Maharashtrian Brahmin family. My style of cooking is deeply influenced by my roots. Liberal use of coconut, groundnut, coriander, tamarind, jaggery and underplayed use of spices. In everyday vegetables, legumes, dals, we do not miss (as in we completely skip)  onion, ginger, garlic and garam masalas. Our food is a medley of simple spices in minimalistic oil where the vegetable of the dish is THE hero! Everyday meal is a fruit vegetable, a leafy vegetable, salad, dal, roti and chawal . But what adds kahani-mein-twist on a plate of simple, fairly bland yet flavourful food are the array of condiments! Methamba, moramba, dry chutnies, pickles- trust me there are encyclopedias dedicated to these. Every family holds a heirloom pickle/chutney recipe. My home is no exception. These recipes are totally versatile and the condiments can be teamed up with absolutely ANYTHING. They make for great dips, spreads, marinades, and AS IS – scoop out a fingerful straight off the jar, close your eyes and take in the burst of flavours as they explode in your mouth! 😀

Kaarla chutney

Kaarla chutney

Kaarla, not to be mistaken for Karela please, also called as Niger seeds, closely resembles black sesame seeds with similar health benefits. Kaarla seeds can be easily found at the local grocer. Karla chutney has a beautiful nutty bite making it a great accompaniment with your everyday roti or bhakari. I’ll also tell you super cool ways to team it up with, but in the footnote. Lets get to business..

Ingredients
1 cup Karla / Niger seeds
1.5 cup grated dry coconut/ kopra
18-20 Begdi Mirchi / Dry chillies
Half cup Curry Leaves
2 tsp salt
1 tbsp sugar
Half tbsp chilly powder (optional)
9-10 garlic pods
1 tsp sesame oil or any neutral cooking oil

This is how I made it –
1) In a heavy bottomed vessel or kadhai, dry roast karla seeds for about 3-4 mins till crunchy. Keep aside.
2) Dry roast grated dry coconut for about 5-7 mins till golden brown. Keep aside.
3) In the same vessel, add a drop of oil and roast garlic, chillies and curry leaves till they are crunchy and aromatic.
4) Tip in all of above with salt and sugar in a blender jar of your grinder. We do not want this very pasty so a blender jar does a better job than the chuntey one.
5) Blend it at intervals using stop start method on low speed taking care not to grind it very fine. DO NOT ADD WATER. This is a dry powder chutney. Karla seeds will be more or less intact and will lend a grainy texture to the mix, this is perfect.
6) Check for seasoning and adjust salt, you could add a tsp or more of chilly powder to increase heat upto your liking.
7) Scrape out every last bit of chutney from the grinder and store in an airtight, odourfree jar.

Tips:

Jar full of chutney

Jar full of chutney

1) Add a couple of tbsp of coarsely ground roasted peanut for extra chunkiness.
2) Mix a tbsp of chutney with equal amount of yogurt and serve as an accompaniment with paratha. My collegues would go gaga over this combo in my lunchbox.
3) Add this chutney to hung curd to make a fab dip with your “secret ingredient” 😉
4) Mix a little chutney with softened butter and spread it on a warm toast.
5) Works like a charm with your simple ghee rice or dal chawal.

.. I Could go on and on 🙂