Salted Caramel Sauce – 5 ingredients and 5 minutes

God or No God. Your argument can swing either way. But there’s absolutely no denying that there IS Food For God. No argument there. If I ever place a devhara (sacred corner in the house meant for idol worship) at my home, all things listed here will be snugly sitting as I pray to the demigod of food to never let my supply deplete and to inspire me to create magical food with their alchemy. Such is my devotion.

Salted Caramel Sauce

Salted Caramel Sauce

My first introduction to salted caramel sauce was 2.5 years back, at Starbucks. During X’mas they had introduced a special coffee on the menu for the holiday season, laced with “Salted Caramel”. I so totally fell for it that I made numerous visits after that. Holiday season passed away in a jiffy, as it always does, and the coffee flavour was taken off the list. My heart sank. It won’t be wrong to say that I waited for a whole year to pass with a hope that it’ll be reintroduced, and guess what! Yes it was! But this time I was prepared for the short spell and had put it on my checklist of recipes to try. After looking up several recipes, which involved reducing copious amount of cream to caramelizing sugar to perfection, I settled for a recipe that required neither. This one is your super simple salted caramel sauce with 5 ingredients and 5 minutes, and like most things simple, it will not fail to impress.

5 Ingredients Salted Caramel Sauce

5 Ingredients for Salted Caramel Sauce

Ingredients-
Half cup salted butter (Half a packet of 100 gms Amul butter)
1 cup brown sugar
2/3rd cup cream (200 ml of Amul Fresh Cream or D’lecta Creme is perfect0
Half to 1 tsp sea salt (poor substitute will be table salt)
1 tsp good quality vanilla extract

This is how I made it-

Decanting salted caramel sauce into a jar

Decanting liquid gold.

1) Melt butter in a deep saucepan on a simmer, swirl it around to avoid getting burnt.
2) Next, add brown sugar part by part. Keep mixing it with a whisk for the next 2 mins just until it melts. You do not need to caramelize sugar for this recipe.
3) Immediately add cream in a thin stream while whisking with the other hand. Once well incorporated leave it for the next 2 mins on simmer till the sauce comes to a boil. Take care that sauce does not burn at any point.
4) Once it comes to a boil, take it off the gas and add sea salt and vanilla extract. Start with half tsp of salt, taste, add more if desired.
5) Decant in a clean odour-free jar. Sauce will seem thin at the beginning, but it’ll gradually thicken as it cools down.
6) Keep it refrigerated. It stores well in the fridge for upto a month.

*Notes-
1) Salt elevates the sweetness of the caramel to a glorious level. So even if you dislike the idea of salty caramel sauce, do not miss a hint of salt just to balance out the overt sweetness.
2) Psst.. add a tsp or more of Old Monk or Bailey’s Irish Cream for a boozy spin.
3) On decanting the sauce into a jar, there’ll be leftover clinging to the edges of the saucepan. Boil a cup of milk in the same saucepan till all the remnants of the sauce is dissolved, pour it in a mug with a tsp of instant coffee or coffee decoction for your cuppa of salted caramel coffee.
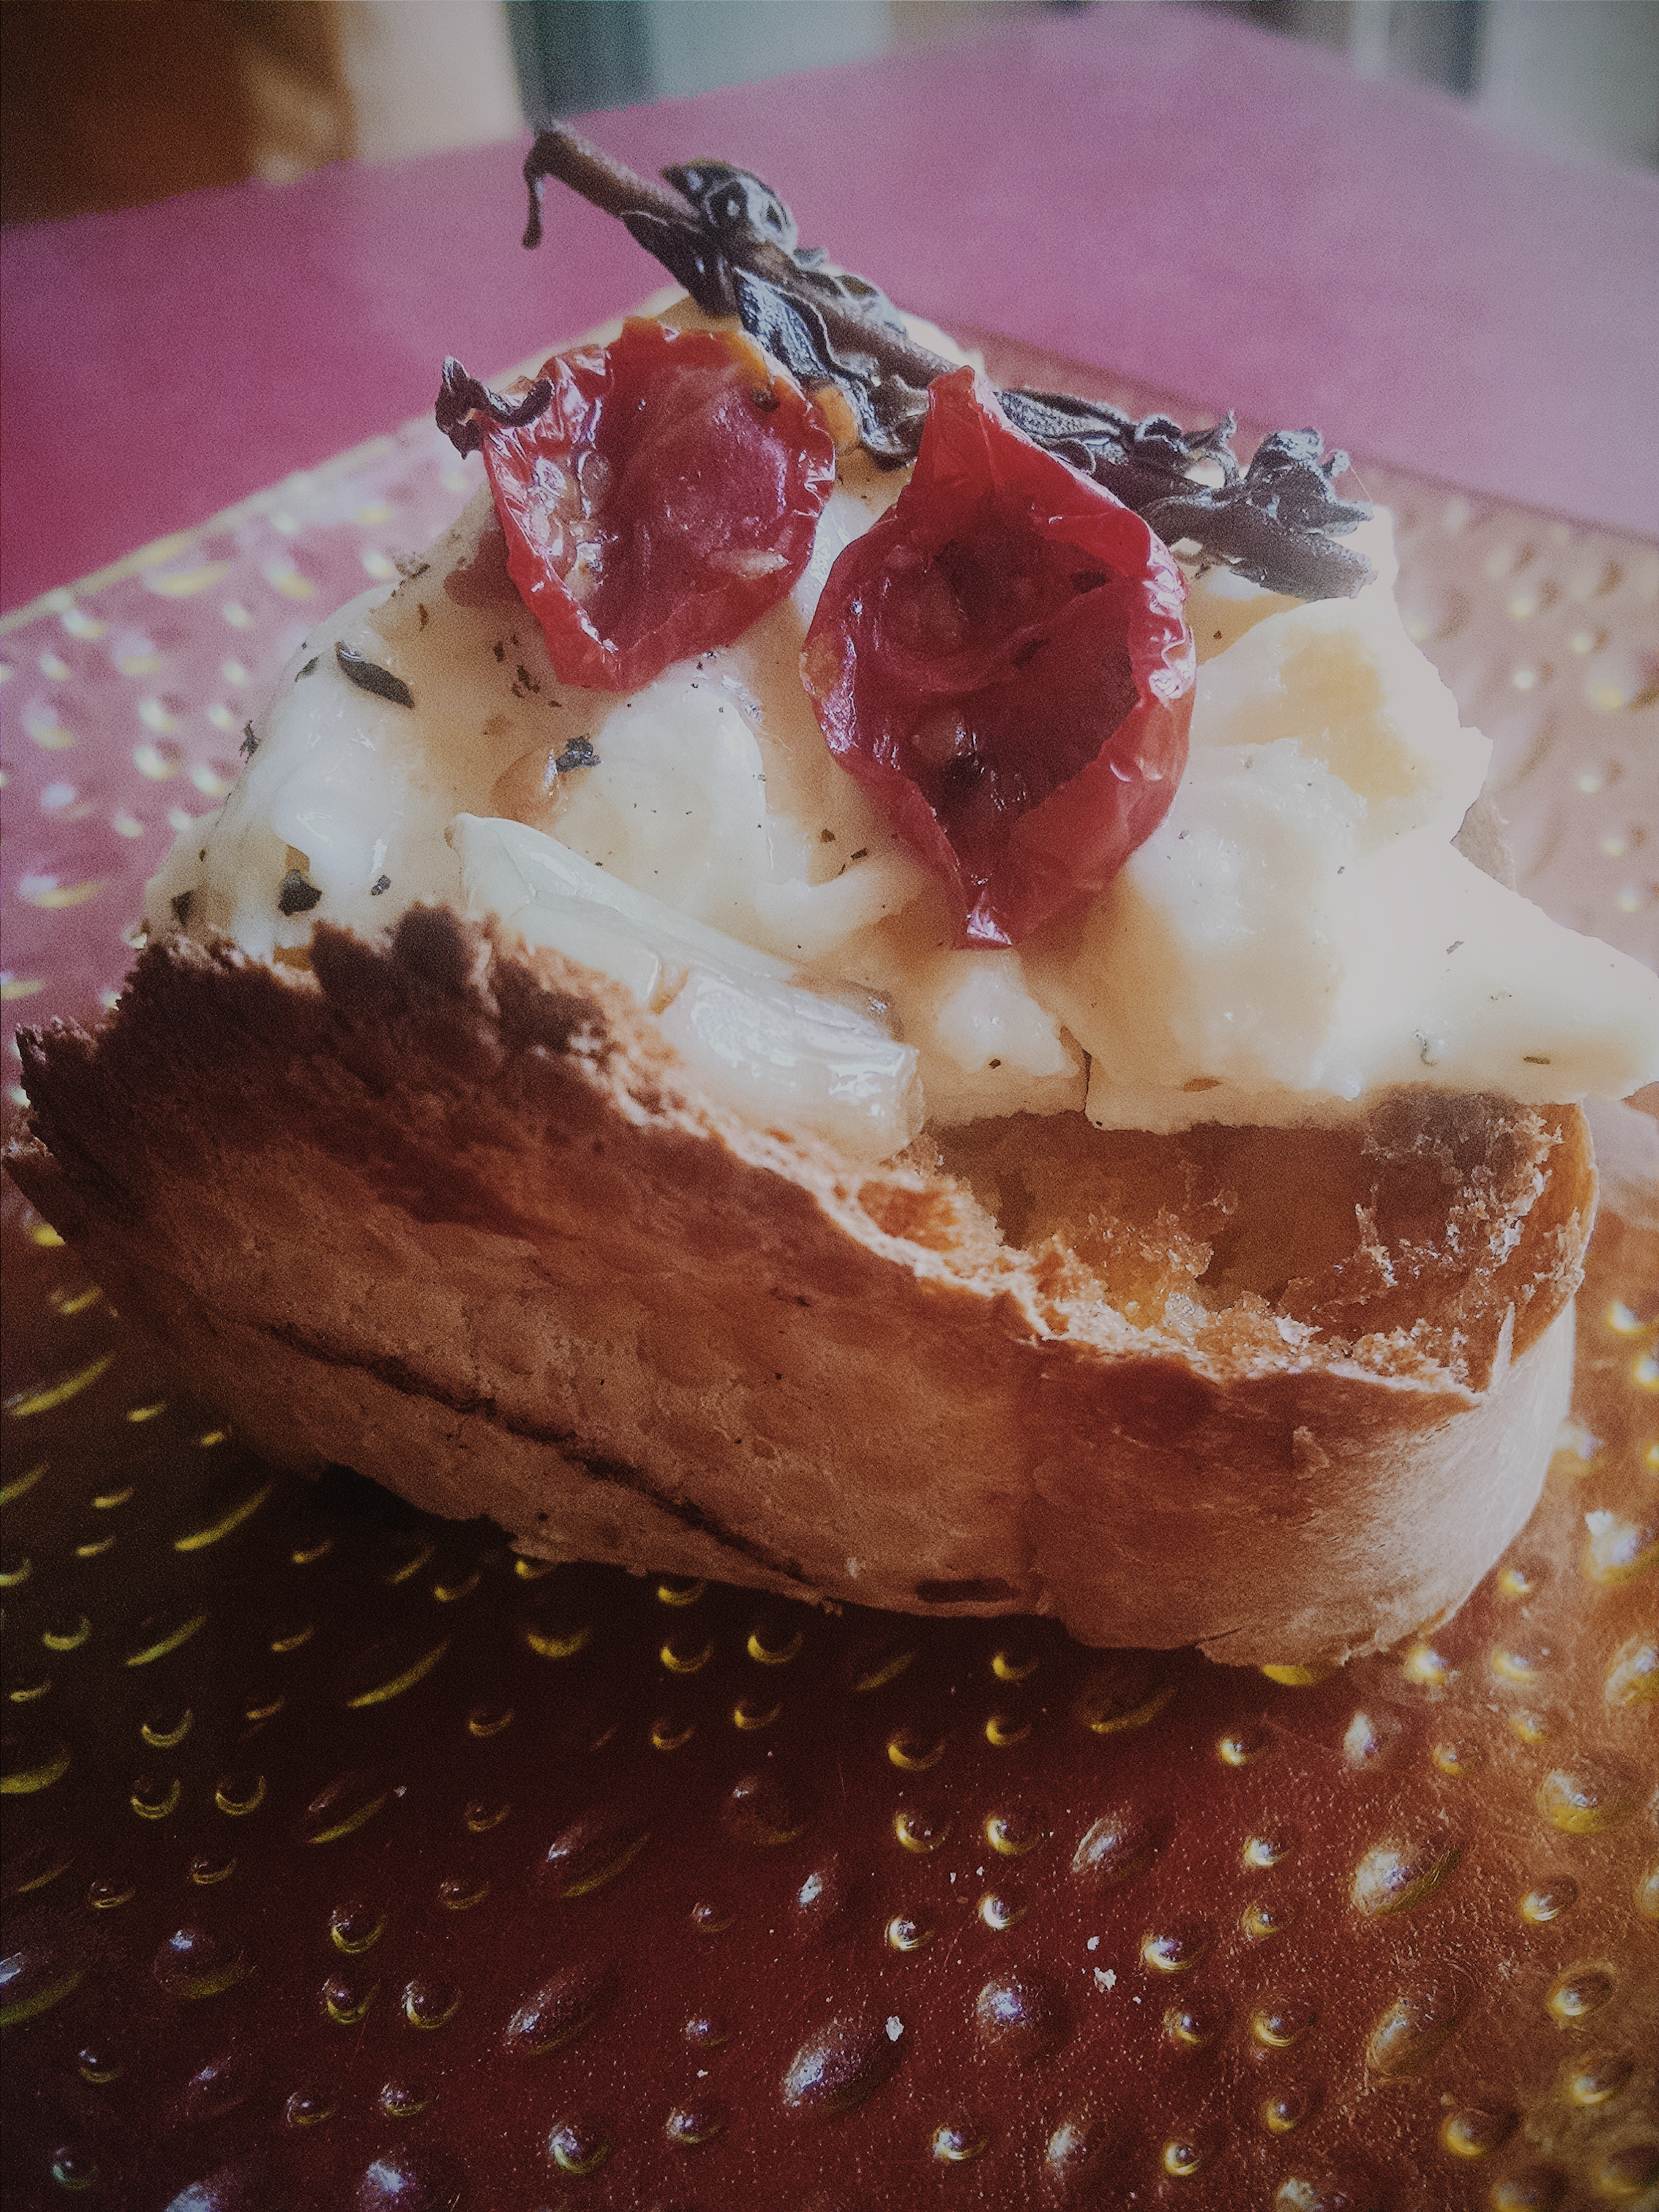
4) Salted caramel sauce can be used in numerous ways. Drizzle over cut fruits, pancakes, waffles, cakes, bread pudding, tea cakes or make an ice cream with it.

Sea salt Caramel Sauce

Sea salt Caramel Sauce

If you’ve an interesting recipe using salted caramel sauce, do let me in!

Cold Watermelon and Mint Soup

Past 6 months has been an exciting time on the social front. All the geographically dispersed friends visited home. Few of them, I met after a gap of 6-8 years. It’s awesome how you to take it forward from where you left with friends, as if the years in between were a wormhole. The warm fuzzy feeling and your comfort zone returns back to you. And with that, memories of the time bygone. Glorious carefree years!

Daughter buddies. Buddy's daughter.

Daughter buddies and buddy’s daughter

This weekend an old friend came visiting with her 6 month old cherub in tow. We’ve 20 years of friendship between us. More a soul sister now than a friend. In the past when she was visiting Bombay, we would catch up over a quick coffee or a dinner, however, a stayover, like old times, had not happened in a decade or more. She was appalled at the menu I had put together for her. She knows me from the time when making a meal of Maggie was the only meal I could put together. I had carefully planned the lunch spread such that it did not come in the way of our non-stop chatter and would be a refreshing one on a hot sweltering afternoon with real feel as high as 46 degrees! We ate to our hearts content, and talked like no tomorrow.

On the menu was-

Summer Menu

Summer Menu

– Cold watermelon and mint soup

– Fruity salad: Grape, tangerine and orange mint tossed with melon seeds, orange juice dressing and edible flowers garnishing.

– Garlic chicken, spinach and cheese Calzone.

– Baked Alphonso mango cheesecake.

– On the standby was spaghetti tossed with slow roasted cherry tomatoes(recipe here) and meatballs. However, we gave it a skip.

– A large jar of lemon and mint iced tea, prepared by R, to wash it all down with.

While I’d share the recipes of all of the above in the subsequent posts, I’ll put down the recipe for cold watermelon and mint soup first, as to me, it was the clear winner. The little one happily slurped down the soup from her sippy bottle while clicking her tongue and smacking her lips in between, which was the ultimate pat-on-back 🙂

Cold Watermelon and Mint Soup

Cold Watermelon and Mint Soup

Ingredients-
1 medium sized Watermelon, chopped in big chunks
Juice of 1 lemon
A handful of fresh orange mint leaves, roughly torn (or regular mint leaves)
Half inch ginger, finely grated
Half tsp rock salt (kala namak)
1 tsp freshly ground pepper
1 tbsp honey (optional, only if watermelon lacks sweetness)
Extra virgin olive oil to drizzle

This is how I made it-
1) Blend watermelon, grated ginger, mint, saving a few for garnishing, with rock salt and honey(if adding) until smooth, without adding any extra water.
2) Pass the juice through a strainer. Refrigerated for an hour or two.
3) Once nice and chill, ladle into soup bowls. Sprinkle on top freshly ground pepper, drizzle olive oil and garnish with a sprig of mint.

..What could be more refreshing on a hot summer afternoon, but a cold watermelon soup and a dear dear friend for company, eh? 🙂

Thai Green Prawn Curry – from scratch

Where I stay, basic necessities are sometimes hard to come by. Exotic herbs and veggies are a far cry. I remember this animated conversation with a bhajiwalla in the vicinity..

Yours truly: “Aap basil kyu nahi rakhte hai, easily bik jayega?”
Bhajiwalla: “Kaa nahi rakhte hai? Baasi?? Yeh kaa hai? Kaisa dikhta hai”
Yours truly: “Baasi nahiii, basil, basil. Woh tulsi ka ped hai na, oh, sorry, woh pudina ka patta rehta hai na, waisa hi dikhta hai” Bhajiwalla scartching his .. nevermind..

You get the drift!

Even at supermarkets exotic veggies and herbs have intermittent supply which makes it very difficult to just run down the corner and make something you desire. It can never be like, oh I feel like pasta in a pesto sauce and take it to a conclusion the same day. So on my last visit to not-very-trustworthy specialty provision store, like a cat, I spoke to the staff and figured out the days they get the fresh stock of veggies in. Voila! Tuesday and Fridays, they said. The next Tuesday I promptly paid a visit and guess what, there was a Trikaya combo pack of Thai curry mix with lemongrass, thai basil, kaffir lime, thai aubergine, all of it, neatly bundled in a packet and just the right quantity! I did a mini jig right then and hoped nobody watched.

Thai Green Curry

Thai Green Prawn Curry

I absolutely love Thai curries. They’ve a close resemblance to Indian coastal curries.  Aroma of lemongrass, the sweet creaminess from coconut milk, undertones of basil and crunchy par cooked veggies completely do me in. In the past I’ve made green curry from readymade paste and it turned out, let just say, not very good. I had a weird assumption that green curry paste is not doable at home, just like a perfect bbq sauce. So I gave up the endeavor and happily ordered in whenever we wanted to eat. Recently I came across a post from Indian blogger living abroad on Thai curry paste recipe. On researching further for alternatives like kaffir lime, which is not easy to come by, I realized, with few alterations it was well within reach. For instance, kaffir lime can be easily substituted with lemon zest, as simple as that! The taste is absolutely uncompromised. I’ve made it twice since then, and this time it was even simpler with no wastage due to the ready mix of herbs and veggie pack. I made it with prawns, but you could do it with chicken or even an all-veggie variation once you’ve the paste ready.

Prawns Green Thai Curry with Longe-grained Basmati Steamed Rice

Thai Green Prawns Curry with long-grain basmati steamed rice

This recipe gives substitute for most of the exotic ingredients, which means you can make it from easily available local producer.

This quantity of paste is enough to make a curry for 8 people. So feel free to halve the recipe.

Ingredients –

:: For green curry paste-
2 stalks of lemongrass
4 shallots, peeled
6-8 small garlic cloves
2 inch galangal, cover peeled and roughly chopped (substitute with equal quantity of ginger)
Handful of coriander
2 kaffir lime leaves (or zest of 1 lemon)
Juice of 1 lemon
4 thai birdeye chillies (or green india chillies)
2 tsp brown sugar
3-4 basil leaves
1 tsp fish sauce (vegeterian substitute – light soy sauce)
1 tsp white peppercorns (or black peppercorns)
1 tsp coriander seeds
1 tsp cumin
2 tbsp coconut milk

::For prawn curry-
1 kg prawns, deshelled, deveined, thoroughly cleaned
1 cup prawns stock* (optional, but really adds flavour)
Assorted veggies of your choice (I used thai aubergine only since it was part of the combo pack)
500 ml coconut milk (if using canned one, I highly recommend Kara)
5-6 basil leaves
1 tbsp oil
Salt to taste

This is how I made it-

:: Thai Green Curry Paste
1) Dry roast peppercorns, coriander seeds and cumin for 2-3 mins till aromatic. Let it cool and blitz to a fine powder.
2) In the same grinder jar, add all of the other ingredients from thai curry paste and grind to a fine paste. Make sure it is really fine and not clumpy.
3) Your paste is ready to use. It stays well in the fridge for upto 2 weeks.

:: Thai Green Curry with Prawns-
1) Heat oil in a wok, add veggies and saute for a min.
2) Add curry paste and saute for a couple of minutes till fragrant.
3) Add coconut milk and let it come to a boil. Simmer for 5 more minutes till slightly reduced. Add salt to taste.
4) If using stock, add now and let it come to a boil. Continue to cook for 2-3 minutes more.
5) Add prawns and cook on simmer. They cook easily, should be done in less than 5.
6) Taste and adjust salt. Add more brown sugar, lime juice if you find it spicy.
7) Top it up with roughly torn basil leaves, give it a quick stir and take it off the gas immediately.
8) Serve pipping hot with steamed jasmine or long-grain basmati rice.

*Notes-
1) For making prawn stock, while de-shelling prawns, save the heads of the prawns and thoroughly clean them under running water. Boil them with 2 cups of water. Let the water reduce to half. Once cooled, strain the liquid, your stock is ready.
2) If using veggies, add them at stages depending on the veggies so that they do not overcook. Veggies have to be par cooked and crunchy. Eg. If using bell peppers, add them right at the end along with basil leaves.

Slow-roasted cherry tomatoes with garlic and oregano

Tomatoes have never inspired me, except as brilliant photo subject. Leave aside Maharashtrian style tomato raita (koshimbir) and soup (saar), since that’s staple in my house, I’ve never really dabbled in a tomato exclusive gravy or a salsa or a pasta sauce or as a marinade. The tangy flavour of a tomato does not go very well on my palette. I often cringe when people fondly talk about how they sink their teeth into raw tomatoes. I carefully remove tomato slices tucked away in the sandwich or burger layers before biting into it. R shares my aversion.

Between all the hate story, it so happened, I spotted the most luscious looking cherry tomatoes in the supermarket, absolutely fresh with the stem still on, as if just been plucked off the vine. Now we’re talking about a certain compulsive buyer, who can spend hours lounging in a supermarket isle of vegetable and fruit section with a yawning husband trying to entertain himself in the sport section. Those luscious tomatoes totally beckoned me, and without much ado I picked up two packets. Needless to say, I was totally clueless about where I would take it from there. I also happened to pick oregano, which was fresh with greenness still in the stems, that’s rare to find. I needed an inspiration. So like all of us, I turned to Google.

Slow roasted cherry tomatoes with garlic and oregano

Slow roasted cherry tomatoes with garlic and oregano

I’ve tried the canned version of sun-dried tomatoes and disliked the dehydrated chewy pickled skins. So that was immediately off the list. Next I came across a recipe for slow roasted cherry tomatoes that looked promising. The opportunities to use this condiment were limitless. So there I set out on the road less traveled, and trust me, only once before had I been so blown away by what lay ahead.

Cherry Tomatoes

Cherry Tomatoes

The recipe calls for slow roasting of 3-4 hours. Before you start cribbing about keeping the oven on for that long in the sweltering heat, let me reassure you, the oven temperature is so low that it would hardly impact your home temperature in anyway, the only by-product is the mind-boggling aroma wafting through the kitchen!  In the end what you get are the shriveled tomato halves, with a little bit of moisture still intact at the center, pickled in its own juices and steeped in the goodness of garlic and oregano flavoured oil. Slow roasting caramelizes the tomatoes giving it a robust flavour. Be prepared for an EXPLOSION of flavours that’ll completely sweep you off your feet. You’ve been warned! 😉

Here is a food fiction to let you savour before you take the plunge. “The Tale Of Two Tomatoes” (in the picture captions)

Cherry Tomatoes

So we begin the tale of 2 tomatoes..


cherry tomatoes

..along with their comrades, and this is how the story goes..

cherry tomatoes

..a drizzle of olive oil here, a dash of oregano there, garlic, sea salt, peppercorns and heavenly aroma everywhere..

slow-roasted cherry tomatoes

..So they rested in a sweltering oven, snugly, for several hours, only to emerge in the end, with those delicious super powers..

..only to have immortalized in their new robust avataar..

…Thus we conclude the tale of 2 tomatoes, along with their comrades..

..thus concludes, the tale of 2 tomatoes, and their comrades. To new beginning!!

..of a gastronomical journey, that was immortalized on a plate 😀

Ingredients –
2 cups cherry tomatoes
15-18 garlic cloves, peeled and bruised
10-15 strands of fresh oregano (substitute 1.5 tsp dried oregano)
1 tsp freshly ground peppercorns
Sea salt, as per taste
Half cup extra virgin olive oil  +  2 tbsp for adding on top later

This is how I made it-
1) Wash tomatoes, pat them dry with a kitchen napkin and halve them along the diameter (like a lemon). Lay them evently on a foil lined baking tray with cut side up, avoid overlap.
2) Place garlic cloves and oregano strands at regular intervals between the tomatoes.
3) Sprinkle freshly ground peppercorns, sea salt and drizzle olive oil evenly along the tray.
4) Place the baking tray in a pre-heated oven at 110 degree Celsius for 3-4 hours.
5) Do not open the oven door anytime in between. Keep checking only in the last hour.
6) Once tomatoes are shriveled up and garlic turned a shade of golden brown from roasting, they are done. Get the tray out of the oven and let it come to a room temperature.
7) Decant tomatoes along with its oil and seasoning in a clean odour-free air tight jar. Top up with 2 tbsp of extra virgin olive oil to preserve them. From here on, opportunities are endless.

Here’s what you can do, from million other can-dos –
1) Toss these beauties with spaghetti for a simple flavourful lunch.
2) Spoon in on a warm toast topped with egg scramble.
3) Top up on your cream cheese bagel.
4) Mix them with a summer salad of your choice.
5) When all tomatoes are done with, use up the gorgeously seasoned leftover oil for a veggie stir-fry.

Recipe: Roasted Pumpkin Soup

Soup culture in India has only just about evolved over the past 15 years. While growing up, the only soup known to us was tomato soup (tomato saar) which was either made on sick days or when omnipresent dal was sent off on a day’s vacation. If dining outside, which, by the way, was birthday special occasion only, our soup choices were limited to sweetcorn, cream of chicken/tomato and manchow. We’ve come a long way since, but what got carried forward to THIS day from THAT era is dividing the soup portion one-by-two or two-by-three so as to have enough tummy real estate for rest of the meal 🙂

Pumpkin soup

Roasted Pumpkin Soup

My soup experiment begins when the day’s loaf is planned. The other day I made a beautiful loaf of Ciabatta, slightly chewy from outside and superbly soft and airy inside, a close cousin of Goan Poi or Bambaiyya kadak pao. But more on Ciabatta’s gorgeousness for another time. Point being, I needed a perfect bowl of soup to polish it off with. So I decided to improvise on my earlier recipe of Pumpkin Soup. All this while I had been sauteing pumpkin in a wok like a subji before pureeing it for the soup. However, it totally lacked the character that you find in a restaurant-style soup. Therefore, I re-hauled the process and made an oven roasted pumpkin soup. Pumpkin itself makes for a very creamy texture, but roasting it adds a subtle smokiness to the soup, while shallots are like a suggestion that add the overall punch rendering other herbs and extra seasoning absolutely unnecessary. It went beautifully with the Ciabatta, and made for a light dinner which was a welcoming break from a regular roti-subzi meal format.

Ingredients –
2 cups pumpkin, deseeded and cubed
8-10 shallots, skin removed
3-4 garlic cloves, bruised
A tsp of sea salt
1/4th tsp freshly ground pepper
1 tsp olive oil for roasting + extra tsp for garnishing
1 tsp fresh cream for garnishing (optional)
2.5 cups water

This is how I made it –
1) Line a baking tray with a foil and evenly spread pumpkin cubes, shallots and bruised garlic.
2) Season with a sprinkle of sea salt, freshly ground pepper and drizzle olive oil on top.

Slight charring after roasting in the oven

Slight charring after roasting in the oven

3) Place the baking tray on the middle rack of the oven, preheated to 175 degrees celsius. Grill for 20-25 minutes till pumpkin and shallots are slightly charred on the top.
4) Remove the baking tray from the oven and let the roasted pumpkin and shallots cool completely.
5) Puree the shallots and pumpkin into a blender with water, add little water at a time for a smooth puree.
7) Remove the puree in a thick bottomed vessel and keep it on a medium flame till it comes to a boil. Straining the soup is not needed as the overall consistency is creamy and even.
8) Taste and adjust salt/pepper seasoning to your liking.
9) Ladle into a soup bowl and garnish with a swirl of olive oil and fresh cream. You could sprinkle almond slivers for glamorizing it further. Serve piping hot.

Gourmet Tip – If using the smaller variety of pumpkin, then scoop out the flesh and keep the shell. You could use the shell to serve your soup in. Nice, eh?

Bon Appetit!

Kerala-style Chicken Ishtew

I’m a big fan of simple rustic preparations where aromatics mingle seamlessly with the central ingredient to create perfect balance of flavours. Be it your everyday dal, ghee rice or a wholesome soup, simple food always fills you up with the sense of warmth that feels like home. By the end of it you find yourself polishing the plate clean and then licking the last bit off your fingers. This is food for soul. Absolutely lip smacking! Kerala chicken stew or rather ‘ishtew’, holds this promise.

Kerala Chicken Stew

Kerala Chicken Stew

When I made this stew for the first time, my kitchen was filled with aromas like never before of freshly ground spices and curry leaves. Imagine this, dropping a fistful of fresh curry leaves into hot oil. You get the drift? Make this on a cold winter night or for a rainy afternoon lunch and serve it with pav to soak the stew.  It is absolutely heart warming 🙂

Ingredients-
1.24 kg full chicken, cut into curry pieces and cleaned thoroughly
2 medium onions, finely chopped
Ginger garlic paste 2 tbsp
3-4 green chilies, slit in the middle
3-4 sprigs of curry leaves
Coconut milk of 1 coconut: 1 cup thin and 3 cups thick*
2 tbsp oil
2 tbsp cashewnut paste* (optional, only if you want a thickish richer stew)
Salt to taste
:: For freshly ground masala-
1 inch cinnamon
12-15 peppercorns
8-10 cloves
4-5 cardamom pods
Half tsp fennel seeds
:: For garnish
Golden fried onions
Curry leaves fried till crispy

This is how I made it-
1) Dry roast all the spices listed under masala for 2-3 mins till aromatic. Grind the spice mix to a fine powder in a mortal pastel or a grinder.
2) Heat oil in a wok, add the powdered masala, slit green chillies, curry leaves and let it splutter.
3) Add finely chopped onion and saute till translucent. We do not need to brown the onions for this recipe.
4) Next add ginger garlic paste and saute till it is cooked.
5) Add chicken, salt and saute till the masala nicely coat the chicken.
6) Add thin coconut milk and let it cook on simmer for 30 mins or till chicken is cooked completely.
7) Now add thick coconut milk and let the gravy come to a boil. Add cashew paste to thicken the stew, cook for another 5 mins.
8) Your stew is ready. Garnish with crispy fried curry leaves and onions and serve with appam, garlic bread, pav or paratha.

Kerala Stew with homemade pull apart rolls

Kerala Stew with homemade pull apart rolls

**Notes-
1) For coconut milk, grate one entire coconut and add it to 2 cups of hot water. Once it has cooled down, grind it and pass it through a sieve to extract coconut milk. This is your thick milk, keep it aside and repeat the process all over again with the pulp. The second extract is your thin coconut milk. You can substitute this with canned coconut milk, needless to say, it won’t taste as great.
2) For cashew paste, soak 8-10 cashews in half a cup of hot water. Once cooled, grind it to a fine paste.

Chicken Hongkong – Or so we like to call it

Between in-laws and me, we lost “-in-law” somewhere in the 11 years of being married to R. I’d rather call Aai, my ‘mother-in-love’, works more appropriate for what we share. In the initial years of marriage when we shared the same roof with parents, Aai would cook all the meals. She would lovingly prepare fresh tiffin each morning before we left for work. On non-veg days, yes, we’ve specials days of the week when non-veg is unskippable, on other days, it is optional :-p, so yeah, on these specials days, she’d pick out the plumpest portion of fish and the fleshiest part of chicken for me, while R would be fuming at his faded glory. She’s the reason why I forayed into the kitchen. She is the masterchef of our house and despite using exactly the same utensils, ingredients and recipes, some dishes just don’t turn out as awesome as hers. Chicken Hongkong is her signature recipe. So while I will put down the recipe here for you, and even if your replicate it to the T, it will only turn out the second best than what we get to have at my home 🙂

Chicken Hongkong

Chicken Hongkong

To begin with Chicken Hongkong has nothing to do with Hongkong. It is your Indianized Chinese and who does not like Indianized Chinese, c’mon?!! This one is for those times when you totally want to have home-cooked chicken, but do not have the inclination to chop and prep up the elaborate essentials. This recipe calls for no veggies and simple everyday pantry ingredients. Go with boneless chicken to save the trouble of thorough cleaning. Chicken Hongkong goes really really well with, hold you breath, chapati, pao or steamed rice! TRUST ME! Remember, it is your quick-fix chicken dish, so lets not complicate life by making an accompaniment. It. Is. Seriously. Not. Needed.

Ingredients
1.25 kg full chicken or 750 gms boneless chicken
2 tbsp cooking oil
5-6 tbsp soy sauce
2 tbsp ginger garlic paste
10-15 garlic cloves, bruised or finely chopped
15 dry chillies, broken, stem removed (I use locally available, moderately spicy, byadgi variety)
A generous handful of Cashews
4 maggie chicken cubes
2 tbsp cornflour
2 cups water
1 tbsp honey (optional)

This is how I made it-
1) Thoroughly clean the chicken, drain out excess water and marinate it with 5 tbsp soy sauce.
2) In a wok, heat oil and add chopped garlic and cashews. When garlic is translucent and has cooked through, add chillies and let them sizzle for half a min, followed by ginger garlic paste. Saute ginger garlic paste for a minute or two till it is cooked.
3) Add chicken, with the soy marinate and saute chicken till it is well coated with the spices.
4) In a bowl mix chicken cubes with 2 tbsp water till dissolved and then add it to the chicken. Gently stir till it’s well distributed. Cover and let the chicken cook for half an hour on low flame.
5) Once chicken cooks through, add water till chicken’s is completely immersed, at this point add extra tbsp of soy, if required. Let it come to a boil.
6) Meanwhile, in a bowl mix cornflour with water to make a slurry paste with no lumps. Once chicken gravy comes to a boil add cornflour paste. Cornflour is your thickening agent. You’ll see the gravy thickening steadily over the next 2 minutes. If you find the gravy still very watery, add a tbsp more of cornflour paste to further thicken. Consistency should be of a sticky gravy.
7) When the desired consistency is reached, add a swirl of honey. Mix and check seasoning, crackle pepper, but only if you want it spicier. You’re done. Serve pipping hot with accompaniment of your choice.

Note:
This recipe does not need extra salt as chicken maggie cubes and soy sauce has enough of it already.

Recipe: Prawns butter garlic

I can have potato and prawns in ANY form. They’re are the irreplaceables of my life.

I feel totally blessed to be born and brought up in an island city with seafood aplenty! I’d prefer seafood to any other meat, any day and prawns hold the top most place in the seafood hall of fame.

Prawns Butter Garlic

Prawns Butter Garlic

Prawns Butter Garlic may seem like an idiot proof combination of ingredients put together and most idiots do that – toss prawns in butter-garlic-pepper and serve. However, the trick is to get going that thickish sauce bursting with gorgeous flavours of the prawns and the seasoning, that makes you immediately want to call for a portion of bread to polish it off with. THAT, my friend, is a rarity. For a long time, I could not get it right, and made it like the idiot I mentioned above. So it happened one day, like a divine intervention, that I stumbled upon a recipe from my colleague’s mom which seemed perfect!

It had that one ingredient which made ALL the difference – CORNFLOUR – the star ingredient which binds all the juices together and lends perfect consistency and coating to the butter garlic prawns. And that’s why, hands down, moms are the best 🙂

Recipe adapted from here, by Mrs. Zahabia Motorwala

Ingredients-
1 kg prawns
Juice of 1 lemon
20-25 small garlic cloves, finely chopped
2 tbsp table butter
1 tsp chilly flakes
Half tsp dried Oregano
1 tbsp cornflour
Salt and pepper to taste
1 spring onion, finely chopped

This is how I made it-
1) Clean, deshell and devein the prawns and drain out the excess water. Need not pat them dry.
2) Marinate prawns with lemon juice and salt, keep aside for minimum 15 mins.
3) Melt butter over low heat in a wok and add chopped garlic. Let it sizzle for 2-3 minutes till it changes colour, but do not char the garlic.
4) Add chilly flakes and give it quick stir.
5) Add prawns, salt, oregano and saute for half a min till prawns are well coated with garlic. Use salt sparingly for we’re using salted butter.
6) Cook prawns on low heat, soon afterwards they’ll let out water. Remove a tbsp of water in a bowl and mix the cornflour till no lumps remain.
7) When prawns are completely cooked, add the corn flour paste and saute for half a minute. Cornflour will bring together all the juices and coat the prawns with a thickish sauce. Taste, adjust seasoning and take it off the heat.
8) Crack some fresh pepper on top and garnish with chopped spring onion.

Believe me you, make this as finger food for a house party, and it’ll be polished off within 3 minutes, irrespective of number of guests 🙂

Funky Brekkie: One Eyed Joe

Weekend breakfast is seldom elaborate at my house. It is THAT time of the week when R and me find peaceful time to catch up. It is THAT time of the week when a certain pint sized being is NOT tugging at our selve or scampering over our shoulder or climbing on the lap using my hair as support, oh yeah, she thinks her mumma is Rapunzel. Zoe is a late riser, and I am not complaining, not just yet. So while the sleeping beauty is in her peaceful reverie, R  whips up a brekkie for us and I put my feet up on the rocking chair as we chatter away to a short lived glory. Holi weekend being a longish one, we decided on role reversal. R took to chair while I whipped up the One Eyed Joe…errrrrrr.. now that didn’t come out too well, did it? 😐

One Eyed Joe

One Eyed Joe

IMG_20150307_124218

Egg in the middle with runny center

At a very quaint looking eatery in South Bombay, I chanced upon a recipe book called “How to boil an egg”. I spotted this interesting recipe called Egg in the Middle, which also goes by the name of One Eyed Joe. It is a repackaged version of sunny-side up in a toasted cheese sandwich with gorgeous runny center. I made a mental note and decided to surprise R over the weekend.

The original recipe calls for simply breaking an egg in the middle of bread slices with a hole in the center over a hot skillet. However you’ll realise as we go, it is a super versatile recipe and can be totally adapted to your fancy (ideas in the footnote).

For One Eyed Joe, you need-
2 slices of sandwich bread- multigrain, brown, white, any.
Grated cheese to cover a bread slice- I mixed mozzarella for texture and processed cheese for taste.
A pinch of salt and freshly ground pepper
A blob of tomato ketchup
A knob of butter or a swirl of olive oil
A cookie cutter or a steel bowl with edges that can cut through a slice.

Here’s how I put it together with pictures-
PhotoGrid_14257125914721) Take 2 slice of bread. Slather tomato ketchup on one slice and generously top up the other slice with grated cheese making sure that cheese is spread out till the edge of the slice. (Use mozzarella with a combination of another cheese. Stringy texture of mozzarella really adds to the Joe.)
2) Place the ketchup slice on the cheese slice to make a sandwich.
3) Drizzle olive oil or slather butter on the outer side of the sandwich.
4) Cut out a hole at the center of the sandwich with help of a cookie cutter or a steel katori.
5) Now place the sandwich with a hole on a hot skillet with few drops of oil. Toast one side on low flame for about 3-4 mins till it turns crispy golden brown.
6) Now flip the sandwich and  break an egg (without whipping) at the center of the hole. To avoid mess, break an egg in a bowl and then carefully drop it in the sandwich hole. To season the egg, crack some pepper and salt on top. Cook it on a low flame for 3 mins or till it is cooked to your liking. PhotoGrid_1425712713030
7) If you like eggs sunny-side-up with runny center, then you’re done. If you like completely cooked egg yolk, flip the sandwich one more time and let the egg yolk fry on both the sides.
8) Meanwhile, on the side, toast the center portion that was cut out from the sandwich till crispy.
9) Place the sandwich on a plate and use the toasted central portion like a lid on top of the egg as a surprise for your loved one to unravel.

IMG_20150307_124101Notes:
1) Use diffferent combination of cheese with mozzarella. But do not omit mozzarella for a stringy decadent sandwich.
2) Add another dimension by slathering mustard sauce/chilly flakes/oregano with tomato ketchup.
3) You can take the Joe a notch up by adding finely cut pieces of crispy fried bacon, ham or salami.
4) Cute one this – To make the toasted central portion of the cheese sandwich look like a lid, take a perfect looking clove and pierce it (crown side of the clove up) at the center to represent a lid handle. Nice, eh? 🙂
5) Serve the Joe alongside baked beans, grilled sausages, grilled tomato and hash brown for a complete English Breakfast. Wash it down with a juice, tea or coffee.

Whole Wheat Pita with Ranch Style Hummus

On no-lunchbox days at work, we ordered a tub of Hummus each alongside a portion of pita from a nearby eatery. By ‘we’, I mean, Me + Team-mates. And by ‘we’, I also mean, ALL of us, without an exception! THAT’s how much we loved it! The eatery made a meeaaan hummus which got inconsistent with time – sometimes it was too garlicy, at other times lacked it completely, sometimes it was a tad salty at other times too thin in consistency, but most times it was quite there! However, they were super consistent with pita bread. It always tasted like cardboard, and THIS was without an exception. The same goes with ready-to-eat pita that we get across provision stores or super markets in the city. So finally I decided to take up the matter into my own hands.

Pita pockets with ranch style hummus

Pita pockets with ranch style hummus

I browsed through several recipes and realized it is the same effort as making rotis at home, only with extra proofing time. The recipe below of wholewheat Pita is tried-and-tested, and the only thing optional is an oven! Woo hoo! So, What’s your excuse? 😉

I’ve used Punjabi atta in this recipe. Punjabi atta has beautiful nuttiness and  coarse texture than the regular atta which lends a great texture to the everyday loaf. But your regular roti atta will work absolutely fine. So all you need to do now is run over to your nearby provision store and buy a packet of yeast if you don’t already have one. So lets go!

Recipe adapted from here

Ingredients
3 cups Punjabi atta or whole wheat flour
1 tbsp fresh yeast or 1/2 tbsp active dry yeast
2 tbsp olive oil
1/2 tbsp salt
1 tsp sugar
1.5 cups water

This is how I made it-
1) Crumble fresh yeast in a bowl and top it up with sugar and half a glass of warm water, leave it in a warm spot for 10 mins.
2) In a large basin, mix flour, salt, olive oil and rest of the water with a wooden spoon till you get a sandy texure.
3) After 10 mins, yeast would have turned frothy, add it to the above mix and knead till the dough comes together. Add more water if necessary, use eye ball measure. Knead dough till it is soft and manageable.
4) Form a ball out of the dough by using circular motion of your palm (imagine cupping a steel plate at the edges and turning it around flat). Lightly oil the utensil and the dough ball and cover with a cling wrap. Leave it in a warm spot to rise.
5) After an hour – hour and a half, your dough would have risen to more than double. Punch it at the center and deflate the dough. Lightly knead the dough for half a min and pinch medium sized balls from the dough.
6) Dust the working surface and roll each ball in puri sized round circles. Cover the circles loosely with a kitchen towel for another 10.
7) There are 2 ways to bake these. Stovetop or Oven.

Baking Pita - Stove Method

Baking Pita – Stove Method

8) Stovetop method: Put one circle at a time on a non-stick tava or frying pan, flip it and let it par cook on both sides till the bread starts puffing up, then roast it on both sides on a naked flame like a phulka using a tong. This method gives better results than oven. Pitas are softer and look absolutely rustic with black marks, like that on a phulka.

Baking Pita - Oven Method

Baking Pita – Oven Method

9) Oven method: Line up 3-4 circles on a baking tray with parchment paper and bake for 7-10 mins in a preheated oven at 250 C. Once they puff up and acquire a light brown colour, time to get them off the oven. This method lends an even colour on the pita but pitas are slighty harder. However overall eating experience is absolutely uncompromised !

10) Bake all the pitas with preferred method and serve right away with creamy hummus or rich, smoky baba ganoush.

Quick recipe of Hummus Ranch style (NO Tahini), adapted from here:

Hummus Ranch Style

Hummus Ranch Style

Grind 1.5 cup presoaked and soft boiled chickpea with 1/4th cup of hung curd/greek yogurt, 6 garlic cloves, juice of 1 lemon, 1.5 tsp brown sugar and salt to taste. Once smooth, add half a cup of olive oil and grind again till creamy consistency. Remove in a bowl and top it up with a glug of olive oil and sprinkle chilly powder and za’atar (roasted cumin powder).

*For regular hummus: Minus hung curd/greek yogurt from the above recipe, Add 2 tbsp of Tahini. Rest of the recipe stays the same.
Tahini Substitute – Dry roast 4 tbsp of unpolished sesame seeds, grind them fine in a mixie, then add a tsp of olive oil, grind again till pasty. Works as good as Tahini!